Introduction
Whether you're a creator building an audience, a business growing your brand, an agency managing clients, or a marketing team coordinating campaigns, Chirpy helps simplify the work behind social media so you can focus on showing up consistently and achieving better outcomes.
Success on social media isn't about creating more content, it's about having a system that enables you to easily create and post content that is consistently compelling, on-brand and on-message.
This guide will walk you through the process of getting up and running with minimum effort, so you can take full advantage of the features Chirpy has to offer.
Connecting Your Accounts
We'll now walk you through connecting each of your accounts, but please take note of the following before we start:
- 1Please ensure you have appropriate accounts on each platform as described above.
- 2The number of accounts you can connect is limited by the tier you have selected.
| Pro | Prestige | Agency |
|---|---|---|
| 5 accounts | 25 accounts | Unlimited |
- 1
Select Connect Accounts in the left navigation panel.
- 2
Select Connect Your First Account.
- 3
Select the account you want to connect.
- 4
You'll be prompted to log in to the platform you selected. Follow the prompts to connect the account.
Repeat the last two steps until you've connected all your accounts — and you're done!
Building Your Brand Kit
Now that you've connected your accounts, the next critical step is to build your Brand Kit. Before walking you through the steps, let's cover some fundamentals.
Why Your Brand is Important
Your brand means everything — in essence it carries your credentials and dictates how you are perceived by your target audience.
What you want to build as you create and post content is Brand Recognition, so people immediately recognize and relate to who you are.
The key to building brand recognition is consistency — every piece of content you create should be on-brand, on-message and compelling to your target audience. Create content they want to read!
What is a Brand Kit
A Brand Kit encompasses everything you want your audience to know about you — who you are, where you are, your logo and colour palette, your core values, the tone of how you communicate, and your core value proposition to your target market, to name but a few.
In Chirpy, your Brand Kit is the foundation on which everything else is built. It provides the necessary intelligence to the platform to ensure everything you create — whether content or creative — is on-brand and on-message. As you use the system, you'll see how this removes all the complexity and effort associated with AI tools.
It is your "brand in a box." It stores the key details that make your content look and sound like you, every time. It helps Chirpy keep your posts consistent across platforms, so you're not reinventing your style for every caption or design.
What it typically includes:
- Your brand name + what you do
- Brand voice (tone, vibe, personality)
- Key messages + topics to focus on
- Words to use (and avoid)
- Audience + goals
- Visual style (colours, fonts, logo)
- Go-to hashtags + links
Your Brand Kit will enable you to literally cut your content creation efforts from hours to mere minutes.
Want the full picture of what each part of a Brand Kit means and why it matters? Read Understanding Your Brand Kit. If you don't yet have a website, you can also click the Create Website button in Chirpy for help creating one.
Creating Your Brand Kit
- 1
Select Brand Kit in the left navigation panel.
- 2
Select Create Your First Brand Kit.
Using the Chirpy AI Brand Kit Wizard
Chirpy includes an AI Wizard that will guide you through the quick start process.
As most people already have an existing website, the easiest route is to let the Wizard scan your website and automatically extract your Brand Kit from there.
If you don't have an existing website, you can choose to answer some questions that let the Wizard guide you through manually creating your Brand Kit.
You can also choose to manually upload a brand bible, sales presentations, logos and so forth to further populate your Brand Kit.
- 1
Let's use the Wizard to scan your website. Select Continue.
- 2
Populate the required fields as per the example, then select Scan & Draft.
The Wizard will scan your website and extract your Brand Kit in under a minute!
- 3
Review the scan results, then scroll to the bottom and select Continue.
- 4
Select and adjust your tone — the way your brand communicates with your audience. It can vary depending on context but should generally reflect your brand personality.
- 5
Choose how you want to use emojis and adjust your colour palette, then select Continue.
- 6
View and further refine your Target Audience, Key Messages and Brand Values, then select Continue.
- 7
View and refine your Content Themes and Hashtag Strategy, and add a Promotional Link that will be included in all your posts. Select Continue.
- 8
Add all your contact information and decide which details you want visible in AI-generated posts, then select Continue.
- 9
Review that all the information you want in your Brand Kit is correct, then select Create Brand Kit.
You're all set!
You've now created your Brand Kit in a matter of minutes, and you're ready to create your first post. By clicking Edit you can modify your Brand Kit at any time. For a deeper dive into what each area means, see Understanding Your Brand Kit.
Creating Your First Posts
Now the fun part starts. As anyone who has been active on social media will know, creating content for posts is no menial task. It is extremely time consuming, especially when you're posting to multiple platforms.
You'll now see how your Brand Kit comes into play and makes your life so much easier, allowing you to create compelling, on-brand and on-message content in mere minutes.
Generating Post Content
In this example we'll continue using our demo site, Beast Mode Consultants.
- 1
Select Create Post in the left navigation panel.
- 2
You'll see two modes you can use to create your post — Easy Mode, which uses a wizard to guide you through creating your post, or Advanced Mode, where you can create it manually.
Using the Chirpy AI Content Generation Wizard
For this exercise, we're going to choose Easy Mode.
- 1
Select the platforms you'd like to post to, then select Continue.
- 2
As we'll be using the Wizard, select Help me with AI, enter a simple prompt as per the example, then select Continue.
- 3
You now have several options you can adjust, such as your tone, the post length, and whether to use emojis or hashtags. Select your Brand Kit, accept the defaults for this exercise, then select Generate for all platforms.
- 4
Your post for every platform is generated in under a minute — each formatted to conform to that platform's specifications.
From a very simple prompt, your results are compelling, on-message and on-brand — all thanks to your Brand Kit.
You can now customize the post content as you wish — either manually or using the simple point-and-click options available, such as Shorten, Expand and Rewrite. When you're happy, select Continue. You're now ready to add media to your post.
Adding Media to Your Post
You can either upload an image or video directly from your device, pick an image or video from your Media Library (covered later), or use the Chirpy AI Image Generator.
Using the Chirpy AI Image Generator
- 1
Select AI Image.
You again have the option of using Easy or Advanced mode.
Chirpy has an extensive set of advanced image and video generation and editing features, which are outside the scope of this Quick Start Guide. Please consult the relevant guides on our site for guidance on using these features.
Here we're going to use the Chirpy Wizard.
- 2
Enter a simple prompt, then select Generate Image.
- 3
Here's the image, generated in minutes and ready to include in your post. You have options to edit, save or regenerate the image — or, if you're happy, use it in your post. Select Use in Post.
- 4
The image is now ready to use in your post and has automatically been saved to your Media Library. Select Continue.
- 5
Your posts are now ready to be published. By clicking a platform in the preview pane, you'll see exactly what your post will look like on each one.
Publishing Your First Posts
You have various options to publish your posts:
- Publish Now — immediately publishes your posts.
- Schedule — publishes at the date and time of your choice.
- Save as a draft — saves the posts in your Drafts folder, which you can access at any time to edit or schedule.
- AI Scheduler — uses the Chirpy Analytics engine to review your post performance over time and suggest optimum times to publish.
As you don't have any post history at this point, select the Schedule option.
- 1
Enter the date and time you want your posts to go out, then select Schedule Post.
Congratulations!
You've now successfully scheduled your first posts.
Viewing Your Posts
To view your scheduled posts, select Calendar in the left navigation pane.
- 1
You'll see your scheduled posts on the date you selected. You can also create your next posts from scratch by selecting Create. Click on your posts to open an expanded view.
- 2
Click on an individual post.
- 3
You now see several options available to you, such as Edit, Remix, Reuse and Reschedule.
Remix is an advanced Chirpy option that lets you create variations of your post to enhance your online presence. It's outside the scope of this guide — please consult the relevant guide that walks you through the process.
Your Media Library
Before concluding this guide, it's important to walk through your Media Library. Select Media Library in the navigation panel.
Your Media Library will become the central repository for all your media assets as you move forward. As you can see, the image you created for your post above has automatically been saved here.
You can populate this library by uploading assets from your device — such as catalogues and listings — but we've found the best practice is to load these assets as you create posts, which then automatically adds them to the library.
Summary
The objective of this guide is to get you up and running in a matter of minutes, so it doesn't go into the host of advanced features available in Chirpy.
We hope you enjoyed the journey. Please consult the other guides available to you — they'll further enhance your experience, saving you time and money while building your online presence and credibility.
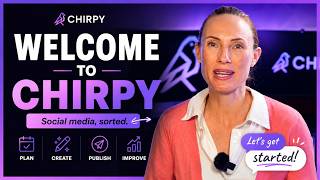
Prefer to watch?
See the video walkthrough
Watch a quick video companion to this guide on YouTube.
 Still need help? Contact our support team.
Social Media Platforms
If you use social media for business, you are likely to use multiple platforms to grow your online presence. If you are just getting started, you will also likely post across several platforms.
However, each social media platform has its own rules regarding content length, tone, format and so forth, so manually creating individual posts for each platform is extremely time consuming.
Chirpy takes care of that complexity for you, saving you hours every week, while keeping your messaging consistent.
Write your content once and Chirpy automatically adapts it for every platform. One click sends your message to Instagram, YouTube, TikTok, LinkedIn, X, Facebook and Pinterest.
Before you connect
Before connecting your social media platforms to Chirpy you'll first need to set up an appropriate account for each platform you want to connect. See the Setting Up Your Accounts guide for platform-by-platform requirements.